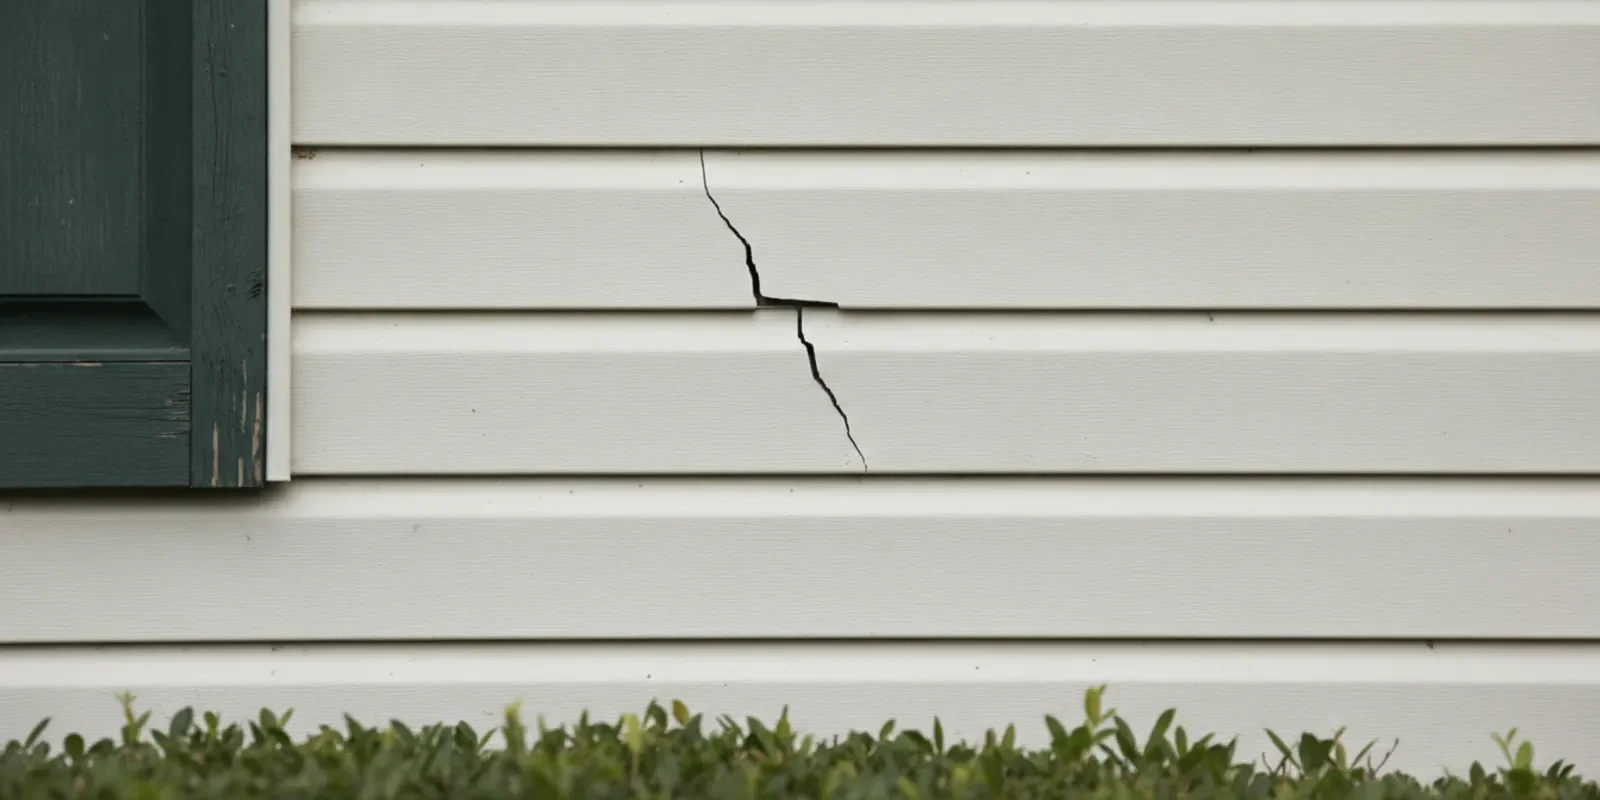
Learning how to repair vinyl siding begins with understanding what is damaged, what remains sound, and whether the repair can be reached safely. A crack in one accessible panel is a different problem from several loose courses, widespread brittleness, or water staining around an opening. The right next step may be a careful panel replacement, further inspection, or a larger repair plan. For homes, the goal is to avoid making a small defect worse. For HOAs and managed properties, it is also to understand whether one location needs attention or several buildings share a pattern.
Call to discuss a siding estimate
How do you assess vinyl siding damage?
Start with a visual inspection from the ground. Walk around the building and look at each elevation in good light. Note cracked, punctured, warped, loose, or missing panels. Check corners, trim, joints, and the areas around doors and windows. Record the side of the building and the approximate height of each issue. Take photographs from a safe location, including one view that shows where the damage sits and a closer view if you can get it without climbing.
Do not touch a panel simply to test whether it is loose, and do not climb a ladder for a closer look if the ground is uneven, the siding is high, or the access area is obstructed. An inspection from the ground cannot establish every hidden condition, but it can create a useful record for a later conversation with a siding professional. If a section is hanging, has sharp broken edges, or is above a walkway, keep people away from the area rather than trying to pull it down.
Separate what you observe from what you think may have caused it. A photograph can show a split; it cannot by itself confirm whether wind, impact, age, heat, or movement caused that split. Note when you first noticed the issue and whether it appeared after a storm, maintenance work, or another event. This makes it easier to compare observations without assuming a cause prematurely.
Cracks and holes: Note approximate size, shape, and location. Record whether the panel still appears attached along its edges.
Loose or rattling sections: Identify whether one panel is affected or several connected courses have shifted. Do not tug on them to find out.
Warping and buckling: Look for waves, bulges, or panels that no longer sit flat. Note whether the change occurs in one small spot or along a longer run.
Missing material: Record the size of the exposed area and whether there are nearby broken pieces. Avoid handling debris from a height.
Moisture clues: Look for water staining, dampness, damaged trim, or deterioration at the wall, window, or door. These clues call for more than a cosmetic panel fix.
Repeated defects: Mark similar cracks or loose sections on other walls or buildings. A repeated pattern can change the scale of the assessment.
Vinyl siding is cladding, not a substitute for investigating the wall behind it. If there is evidence of moisture or damage to sheathing, framing, window trim, or other underlying components, replacing only the face panel may leave the source unaddressed. Do not pry open a large area or cover an active leak without understanding where water is entering. A qualified assessment is appropriate when damage extends beyond the siding surface or the affected area is difficult to reach.
Can you repair one vinyl siding panel?
Often, one damaged panel can be replaced if the surrounding siding is sound, a compatible piece is available, and the work can be done safely. Vinyl siding courses interlock. In general, a repairer uses a siding removal tool to disengage the lower edge of the course above the damaged panel, releases the affected piece, and fits a replacement into the course below. The upper edge is then reattached using the siding system's specified method.
This overview is not a universal installation specification. Profiles, fastening details, age, temperature, and product condition vary. The panel needs room to expand and contract; fastening it too tightly can contribute to buckling. An older or brittle panel may crack while being handled. Use the manufacturer's instructions for the particular product, and do not improvise fastening details when product information is unavailable.
A limited repair is most realistic when the damaged area is small, the product can be identified, the replacement fits the existing profile, and the work is reachable from stable ground or an appropriate work platform. Stop if the panel resists release, adjacent pieces begin to crack, or the job requires reaching across a roof, using an unsafe ladder, or working close to electrical equipment. A repair that cannot be done safely is not a suitable DIY task.
What does a limited panel replacement involve?
Document the location. Photograph the full elevation and the damaged area. Note the course, approximate panel length, and nearby corners, windows, doors, or trim. These details help identify the right replacement.
Check surrounding material. Look for brittleness, distortion, loose attachments, or moisture clues. If nearby pieces are also failing, pause before treating the problem as a single-panel repair.
Identify the product. Look for leftover siding, product paperwork, a record from the original installer, or markings that may help identify manufacturer and profile. A color name alone is not enough to establish fit.
Confirm a compatible replacement. Compare the shape and dimensions, not only the color. A visually similar piece that does not interlock correctly is not a workable match.
Plan safe access and protect the area. Consider ground conditions, overhead lines, people below, and where tools or removed pieces will go. Do not work from a makeshift platform.
Release the damaged piece carefully. Follow the product's procedure and use a suitable siding tool. Work slowly; do not force an interlocking edge or lever against a fragile neighboring panel.
Fit and attach as directed. Preserve the movement allowance and attachment method specified for that product. If the piece will not sit correctly without force, stop and reassess.
Inspect the finished courses. Check that the replacement interlocks, lies evenly, and does not create a new gap. Recheck the area after ordinary weather exposure for movement.
If a replacement will not fit, do not hide a poor fit with sealant or extra fasteners. A repair should preserve designed movement and should not divert water into the wall assembly. When product instructions are uncertain, the surrounding material is failing, or a hidden condition is possible, get help before continuing.
For a broader view of the work Middledorf advertises, see its siding services page. The service page is useful context for a service conversation; it does not replace checking the condition and product details at a particular property.
What tools and materials could be involved?
A focused panel replacement may call for a siding removal tool, a compatible replacement panel, and the fasteners or other attachment materials specified for that product. The exact tools depend on the siding system and the location. Ground-level work is not equivalent to work on a second story or above a sloped roof. Before starting, confirm that the material is appropriate and that the area can be reached without unsafe access.
A general tool list on the internet is not a substitute for manufacturer instructions. A method that works for one product or profile may not be appropriate for another. For a small puncture, some products may have a repair option, but its appearance and suitability depend on the size, location, material, and maker's guidance. A patch may be more visible than a replacement panel and may not be suitable for a split, a loose edge, or damage near a joint.
Before gathering tools, ask whether the repair actually has a clear endpoint. If the siding is brittle across a broad area, removing one piece can trigger more cracking. If there is moisture, the work may need to include investigation and repair of what lies behind the cladding. If the product cannot be matched, the question becomes whether a small repair will be acceptable visually or whether a larger section should be evaluated.
For an occupied property, tools and materials also affect people using the building. Keep removed pieces and equipment controlled, maintain clear paths and exits, and plan where work will take place. Property managers should consider advance notice, access routes, parking or staging constraints, and whether any temporary access restriction is needed. These practical details do not determine the technical repair, but they can prevent avoidable disruption during the work.
Should you patch, replace a panel, or replace a larger area?
The choice depends on the kind of damage, the condition of the material around it, the feasibility of a match, and the presence of any underlying problem. A patch may be considered for a small puncture only when a suitable product-approved approach exists. A panel replacement may make sense for one split or missing section when the adjoining courses are sound. Broader replacement deserves consideration when several panels are damaged, the material is brittle across an elevation, defects recur, or compatible pieces cannot be found.
There is no universal number of damaged panels that automatically means a wall should be replaced. One missing panel at a vulnerable location may require more investigation than several shallow marks on an otherwise sound surface. Likewise, a visibly small defect can be part of a larger issue if moisture has reached the wall. Assess the full pattern and cause before choosing a scope.
Observed conditionPossible next stepQuestions to resolveOne accessible panel with localized damageEvaluate a panel replacementAre adjoining pieces sound? Is a matching profile available? Is access safe?Small puncture on otherwise sound materialCheck whether the manufacturer permits a repair methodWill the repair be durable and visually acceptable for this product?Several cracked or brittle panelsAssess a broader section or elevationIs there a repeated cause? Can replacement material be sourced?Loose siding with staining or damaged trimInspect related components and possible moisture entryWhere is water entering? Are trim, flashing, or wall materials affected?Repeated failure after prior repairsReassess the cause and the scope, not only the latest defectDid the earlier repair address the underlying condition and product fit?
This comparison supports planning; it is not a diagnosis. An onsite review can help distinguish surface damage from a larger condition and clarify whether limited replacement or a broader scope is appropriate. Middledorf advertises siding and other property-improvement work for residential and managed properties. The company offers free estimates; a property owner or manager can use that conversation to describe the observed conditions and discuss a relevant next step.
How do you check for problems behind the siding?
Look for clues around, rather than only on, the damaged panel. Staining beneath a defect, soft or deteriorated trim, dampness near an opening, recurring interior moisture, or a panel that repeatedly loosens can suggest that the visible siding is not the whole issue. These signs do not prove a specific cause. They do indicate that a simple cosmetic repair should not be assumed to solve the problem.
Pay particular attention to transitions: where siding meets windows and doors, corners, roof edges, decks, and other materials. Those areas involve joints and details that may be part of how the wall sheds water. Do not remove trim or caulk a joint simply because it looks imperfect. The right approach depends on the assembly, the location of the defect, and the product's design.
If water is actively entering, protect people and belongings from the immediate effects and seek appropriate help. Do not climb to cover a high opening, and do not seal a gap blindly. An improvised seal may conceal an entry point without correcting it or may interfere with intended drainage and movement. Record when the water appears, what weather preceded it, and where you see evidence indoors or outside. That information can guide an inspection.
For a property manager, create a record that keeps observations distinct from conclusions. For example, âwater stain below the second-floor window on the east elevationâ is more useful than âbad flashingâ when no one has inspected the detail. Include the date, photograph, building and location, and any change noticed after rain. The contractor or qualified inspector can then assess the source rather than inheriting an unverified diagnosis.
How do color and profile matching affect the repair?
Vinyl siding can change appearance over time with exposure, and a new piece may not look identical to older material even when its original color and profile are known. A sun-facing wall may have changed differently from a shaded elevation. A sample or color name can identify a starting point, but it cannot guarantee a perfect visual match on an existing building.
Check the profile as carefully as the color. The replacement must connect correctly with the existing courses and trim. Compare samples in natural light and, when possible, near the wall where the repair will occur. A piece that seems close indoors may look different outside. Ask whether the piece is from a compatible product line and whether its shape and locking edge align with the installed siding.
If an exact match is unavailable, consider the repair's visibility and the property's appearance standards. A small, inconspicuous section may be handled differently from a prominent front elevation. A larger, visually consistent replacement area may be worth evaluating, but that decision should follow an assessment of actual condition and material availability rather than color alone.
On an HOA or condominium property, consistency may involve more than one panel. A plan can take account of existing color standards, multiple elevations, building-by-building variation, resident expectations, and project timing. If siding work is being considered alongside a reserve study, boards and managers can use observed conditions to discuss scope and timing with appropriate professionals. Middledorf coordinates painting, siding, roofing, and carpentry work for managed properties; it does not write the community's reserve study.
How should an HOA or property manager organize a siding assessment?
For an occupied community, first find out whether the concern appears isolated or repeated. Ask staff or residents to report locations in a consistent format, but do not ask them to touch damaged material or climb to inspect it. Map observations by building and elevation. A useful entry identifies the building, side, approximate height, type of visible damage, date noticed, and photograph reference.
Next, group findings by pattern. Are the issues concentrated on one wall or spread across multiple buildings? Do they involve the same exposure, product, opening detail, or type of visible defect? The map does not establish a cause, but it helps an assessor see whether a single repair request may be too narrow. Keep confirmed observations separate from possible explanations.
Resident coordination: Identify shared walkways, access routes, parking or staging constraints, and what residents need to know before work begins.
Scope consistency: Compare affected locations with existing colors and material standards. Decide whether the initial review should cover one repair, a building, or a coordinated set of elevations.
Timing: Consider weather exposure, access, other planned exterior work, and the community's approval schedule. Do not assume every activity can be combined or completed in one visit.
Related components: Record damaged trim, caulking concerns, or other visible issues so they can be assessed alongside the panel rather than dismissed as unrelated.
Documentation: Keep the photo log, notes, relevant product information, and proposal scope together so the board and manager can evaluate the same observations.
Decision process: Identify who can authorize an inspection, who reviews the proposed scope, and what information the board needs before approving work.
When asking for an assessment, a manager can describe the count and locations of observed defects without prescribing a repair method. For example: âThree buildings have loose panels near second-floor windows; photographs show staining at two locationsâ is more actionable than âreplace all siding.â The first statement communicates evidence and invites assessment. The second may set a scope before the cause and extent are known.
Project examples can illustrate the kinds of coordination involved, but they are not a promise that another property will have the same scope or result. Middledorf's company-published material describes work on an Arlington condominium with 45 buildings and a Bethesda community with 10 buildings. Those examples concern particular projects; they do not establish a standard schedule, cost, or outcome for another property. A board can use a proposed assessment to clarify what is known, what remains uncertain, and what decisions are needed.
When exterior work is being considered alongside an existing reserve study, use the study as a planning reference where appropriate, not as a substitute for inspecting current conditions. A study may inform timing and budgeting, while an onsite review addresses the observed siding and related components. A contractor can discuss its proposed work scope; the association remains responsible for its own approval and planning processes.
What can a homeowner do before requesting help?
A homeowner can make a useful record without attempting a risky repair. Photograph the damage from the ground, note when it was first noticed, and record whether it appeared after a storm or alongside another exterior issue. If there is an active leak or a large opening, prioritize appropriate temporary protection only when it can be done safely. Do not climb to cover it yourself.
When discussing the issue, share what you know about siding age, product or color, past repairs, and any water marks or interior symptoms. Explain whether the concern involves one panel, a corner, an opening, or a larger wall area. If there is leftover material or product paperwork, note that it may help identify a match. Do not assume a color name by itself establishes product compatibility.
It can also help to prepare a short set of questions: Is the visible damage limited to the panel? Are nearby pieces sound? Is a compatible replacement available? Is there evidence that water reached the wall? What access is required? The answers establish whether a limited repair is practical or whether a broader inspection is warranted. Middledorf offers free estimates, and its siding information provides context for the work it advertises.
What changes when the property is commercial or multi-building?
At an office, school, religious institution, or managed residential community, a siding question has both a building condition and an operational side. The repair still depends on material, access, and the condition behind the cladding. But the inspection plan may also need to account for occupants, entrances, deliveries, shared routes, and the timing of other work.
Begin with a clear site list. Identify the buildings or wings, the affected elevations, the visible issue, and whether people use the area below. Note restricted access, sensitive operations, or locations where staging would interfere with normal activity. This information helps a contractor plan an inspection that is focused and practical, without assuming that weekend or after-hours work is available for every job.
For multiple buildings, distinguish a survey from a repair scope. A survey documents visible conditions across the agreed locations. A repair scope states which items are proposed for work. If one small defect is found during a broader review, the parties can decide whether it should be addressed immediately, grouped with other repairs, or investigated further. This distinction helps decision-makers compare proposals on the same basis.
Managers can also use a simple tracking sheet with columns for building, elevation, location, observed condition, photo, urgency for review, and status. Avoid presenting the status field as a technical conclusion unless someone qualified has inspected the location. âNeeds assessmentâ is more accurate than âwater intrusion confirmedâ when the record contains only a stain. Updating the same log after work makes it easier to see which locations were repaired and which remain open.
When should you stop and contact a siding professional?
Stop DIY work when the repair is above safe reach, requires roof access, involves loose or brittle material across a large area, or could disturb electrical lines, window components, or other building elements. Seek an inspection when there is water intrusion, soft or damaged material behind the siding, repeated panel movement, or visible defects across several elevations. Professional input is also sensible when the product profile is unknown or a replacement piece will not fit.
It is also time to pause when the repair's apparent simplicity depends on guessing. If you cannot tell whether a panel is designed to move, do not lock it down with extra fasteners. If you cannot tell whether a dark mark is dirt, fading, or moisture, record it and ask for an assessment rather than concealing it. If adjacent panels begin to crack during removal, stop before a small repair becomes a larger opening.
Do not use sealant as a universal fix for gaps or cracks. The correct response depends on the defect's location, how the siding is designed to move and shed water, and whether water has reached the wall. An improvised patch can make a defect less visible without addressing the underlying issue. Keep people clear of loose or falling sections and request suitable help for unsafe or extensive conditions.
Request a free siding estimate or site consultation
How do you choose the next step?
For one small, accessible defect in otherwise sound siding, identify the product and follow its repair instructions before attempting a careful panel replacement. For widespread brittleness, recurring damage, a poor match, unsafe access, or any sign of moisture behind the cladding, pause and have the condition assessed. A record of locations, photographs, product information, and related concerns helps homeowners, managers, and boards decide whether a focused repair or a broader replacement scope deserves consideration.
A useful repair decision is specific to the property: what is damaged, what is sound, what remains unknown, and what can be reached safely. Start with those facts, avoid covering a hidden problem, and choose a repair scope that fits the evidence rather than the first visible symptom.