
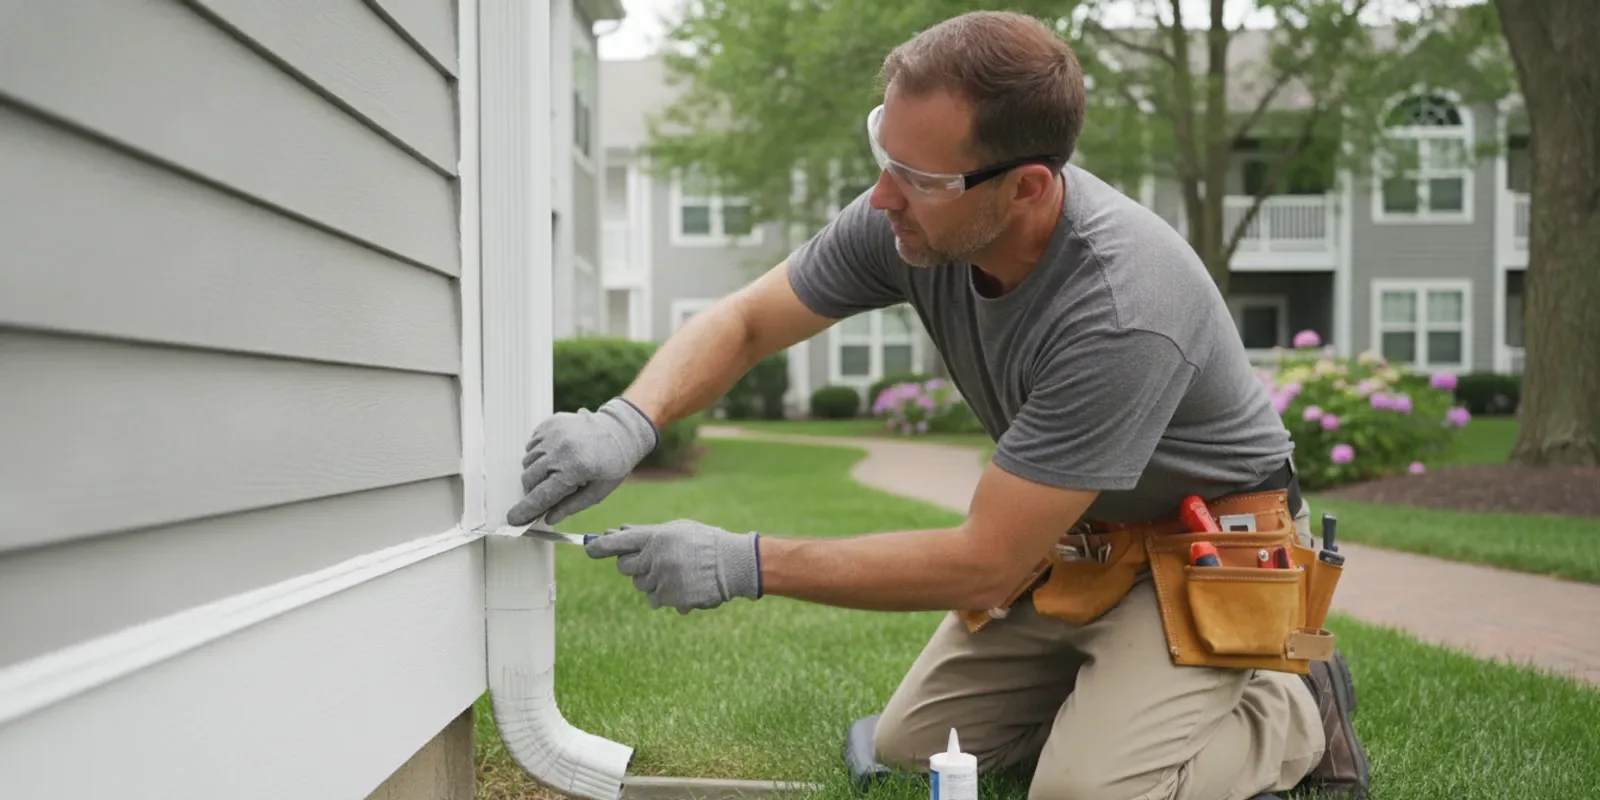
Exterior caulking and sealing are small parts of a building envelope, but they deserve attention because gaps at joints can let water and air move where they should not. A useful maintenance plan looks beyond the bead itself: inspect the adjoining siding, trim, paint, flashing, and surrounding surfaces, then decide whether a localized repair or coordinated exterior work is appropriate.
Call to discuss an exterior estimate
What does exterior caulking and sealing address?
Exterior caulk is a flexible material used to close selected joints and gaps between building components. Depending on the location and construction, those joints may occur where trim meets siding, around a window or door frame, at a change in material, or at another small opening that is intended to be sealed. A sealant may also be specified for a particular joint or material. The important point is that sealant belongs only where the assembly is designed to receive it.
Caulking is not a substitute for every other part of an exterior wall. It does not repair rotten trim, replace missing flashing, correct a drainage problem, or restore failed siding. Nor should every visible crack be filled without first understanding why it is there. Some joints need to move; some openings are intended to drain or ventilate; and some apparent gaps indicate a larger condition that needs evaluation. Treating all gaps alike can result in a repair that hides a symptom while leaving the cause in place.
For an owner or manager, the practical goal is to keep exterior components working together. A sound joint can limit unwanted water entry, but it is only one element among siding, trim, roof edges, flashing, paint, and the paths that direct water back out. Inspection should consider the whole area, not merely whether a line of caulk looks smooth. A good maintenance question is not simply whether a bead is present, but whether that particular joint is meant to be sealed and whether both surfaces around it are sound.
Where are the common exterior joints to inspect?
Inspection locations vary by building design and materials. A ground-level walk-around can note visible joints, but it cannot confirm the condition of every upper-story joint or concealed assembly. Use a consistent route and record the exact location so a concern can be revisited or shared with a contractor. On a home, start with visible edges around trim, doors, and windows. On a condominium or commercial property, organize observations by building and elevation so that similar details can be compared without assuming they are identical.
Trim-to-siding transitions: Look along the edges of exterior trim, corner boards, and other trim pieces where they meet siding. Note open gaps, separated material, or paint failure along the joint.
Window and door perimeters: Examine accessible frame edges and adjacent trim. Look for a joint that has pulled away, cracks at a corner, staining, or soft-looking wood. A surface seal should not block a designed drainage path.
Changes between materials: Where masonry, siding, metal, or trim meet, the joint may need a product and detail suitable for both materials and their movement. Do not assume that one generic caulk suits every interface.
Exterior penetrations: Observe accessible edges around pipes, vents, and other penetrations. The correct detail depends on material, location, and purpose; do not seal an opening that is meant to ventilate or drain.
Decks, porches, and attached features: Check adjacent wall transitions and trim without treating all gaps in a deck or porch as caulking defects. These areas may have drainage requirements or use materials that need a different repair approach.
Previously repaired areas: Note patches that are cracking, loose, unusually thick, or layered over older material. Repeated application over an unresolved joint can hide rather than solve the underlying issue.
On a larger property, inspect a representative range of exposures and building types rather than assuming one elevation tells the whole story. A condominium community may have different siding, trim, window details, or repair histories from one building to another. Keep findings tied to a building number, elevation, and approximate location. If one side has a history of repairs, record that history rather than treating its current appearance as typical of the whole community.
What signs suggest a joint needs attention?
Look for separation between sealant and one or both adjoining surfaces, a split or missing section, a brittle or visibly deteriorated bead, or an open gap where a joint is expected to be closed. Paint that is peeling or bubbling near a joint can be a reason to investigate the surrounding surface, though it does not by itself establish the source of the problem. Water staining, dampness, or recurring discoloration near a window or trim joint also deserves attention. These observations are clues to investigate, not a diagnosis of the cause.
Record what you can see without disturbing the assembly. Photograph the location from a distance and close enough to show the detail, include a reference point, and note when the observation was made. For managed properties, identify the building, elevation, component, and whether the issue appears isolated or repeated. A useful note says what is visible, such as a gap at a named trim edge, rather than assigning blame or declaring a hidden failure. This gives decision-makers a better basis for comparing conditions and arranging an onsite review.
A visual walk-around is not a substitute for safe access or a full assessment. Do not climb onto a roof, lean out of a window, use a ladder beyond your ability, or probe a suspected soft area in a way that could damage material. If the condition is high up, concealed, or near electrical equipment, arrange an appropriately qualified professional to evaluate it. A safe observation is useful even if it cannot answer every question; make clear what was and was not visible.
Why does caulk fail or pull away?
There can be several reasons a joint stops performing. The sealant may have aged or been exposed to conditions it was not designed for. The surfaces may not have been prepared appropriately when it was applied. A joint may move more than expected, or the selected product may not be suitable for the materials. Water may be getting behind the joint from another location, and the visible bead may be only a symptom. Looking only at the failed material may miss the surrounding condition that caused the failure to recur.
Surface condition matters. Dust, loose paint, old sealant, moisture, or deteriorated substrate can interfere with a repair. A new layer placed over a weak or contaminated surface may not bond as intended. The repair may also fail if joint geometry is unsuitable for the product or if sealant is asked to bridge an opening it was not intended to span. Correct preparation and product selection depend on the particular materials and manufacturer directions. A proposal should make clear what preparation is included rather than simply promising new caulk.
Movement is another consideration. Building components expand, contract, and respond to changes in temperature and moisture. A sealant joint must be appropriate for its width and expected movement. A rigid filler in a moving joint can crack; an overly thick bead may not perform as intended. This is why the first step is to identify the joint and its function, not simply to select a tube from a shelf. The solution must suit the construction detail and the materials on both sides of the joint.
Finally, caulk cannot compensate for a failed component. If siding is loose, trim is decayed, flashing is missing, or a roof-edge detail is directing water behind the wall, sealing one visible line may provide false reassurance. Find the source and plan the correct repair before deciding whether new sealant is part of it. If a similar repair has failed repeatedly, make that history part of the discussion rather than authorizing another surface application without investigating why it did not last.
How should an owner or manager prioritize findings?
Prioritization should reflect the location, extent, and apparent consequence of the condition, not just how noticeable it is from the street. A small open joint near a vulnerable transition may deserve prompt review, while a cosmetic crack in a sheltered location may be less urgent. A visual observation alone cannot determine full risk, so use it to organize a closer assessment rather than to make a definitive diagnosis. Keep urgent observations distinct from ordinary appearance items so they are not lost in a long maintenance list.
Address signs of active water entry first. Document interior staining, damp materials, recurring leaks, or visible moisture near an exterior joint and arrange an appropriate evaluation. Do not assume caulk at the nearest exterior seam is the source.
Identify damaged adjoining materials. Soft, split, loose, or visibly deteriorated trim and siding require more than a cosmetic bead. Record the component and request review of the substrate and water-management detail.
Look for repeated conditions. Several similar failed joints on one elevation or across multiple buildings can signal a broader maintenance need. Map occurrences before deciding between isolated repairs and a coordinated scope.
Separate water-management work from appearance work. Paint touch-up may improve appearance, but it should not be treated as repair to a failed joint or damaged substrate. Address the underlying condition before coating work.
Plan access and sequencing. If work involves upper elevations, multiple buildings, or other exterior trades, coordinate access, resident communication, surface preparation, repairs, and painting as a sequence.
For a homeowner, this may mean collecting observations and arranging an onsite estimate when the condition extends beyond a simple, accessible maintenance task. For an HOA or property manager, it can mean compiling building-by-building findings, reviewing maintenance records, and discussing scope with the appropriate decision-makers. Neither approach requires guessing at a repair cost before the condition is understood. A useful first decision can be whether an assessment is needed, not which product should be applied.
How often should exterior caulking be inspected?
There is no single inspection interval that suits every property. Climate exposure, building design, construction materials, past repairs, and the condition of adjacent components all affect what deserves attention. Follow applicable maintenance guidance and product instructions, and use routine property observations to catch visible changes. An inspection schedule should be realistic enough to repeat and detailed enough to compare findings over time. Set the frequency based on property needs and existing maintenance practices instead of assuming that every building needs the same annual treatment.
Owners can check visible exterior conditions as part of seasonal or routine property maintenance, especially after severe weather or when another exterior project brings the area into view. That does not mean every property needs a new caulk application each season. Reapply only when joint condition and the specified repair call for it. Repeatedly sealing sound joints can be unnecessary and may interfere with intended drainage or ventilation details. A visual review can identify items to monitor without automatically turning each item into a repair order.
For managed communities, a recurring inspection record can make patterns easier to recognize. Note the date, conditions observed, building or unit range, location, and action taken. If a contractor is already reviewing siding, trim, or painting, ask that visible joint conditions be included in the scope discussion. Such coordination does not guarantee that concealed conditions have been found. It does, however, create a chance to review related visible work while access and planning are already being considered.
After a repair, retain product or scope information available from the contractor, along with photographs and location. Future reviewers can distinguish a recent repair from an older one and see whether the condition recurred. Do not infer a warranty period or expected service life unless it is stated in actual written project terms and applicable product documentation. Keep records even when the conclusion is to monitor a location rather than repair it; a dated comparison can help show whether the condition changed.
What is the difference between caulking, sealing, and waterproofing?
In everyday conversation, people may use these words interchangeably, but they do not always describe the same work. Caulking commonly refers to filling a joint with a flexible sealant. Sealing can refer more broadly to applying a product or detail that closes a surface or joint. Waterproofing often describes a larger system or assembly intended to manage water, not merely a visible bead at a trim edge. The exact meaning depends on the project and contractor's scope. Ask for the work to be described in specific terms rather than relying on a broad label.
When discussing a suspected exterior gap, describe the location and what you observed. Ask which component will be repaired, whether old material will be removed, how surfaces will be prepared, and whether the proposed work addresses the source of water entry. If the scope uses the word seal, clarify exactly what will be sealed and what will remain open for drainage or ventilation. A plain description reduces the risk that an owner and a contractor use the same word for different tasks.
That level of detail is particularly useful in a multi-building project. A scope should distinguish a joint repair from replacement of damaged trim, siding work, flashing repair, or painting. Otherwise, two people may use caulking to mean different tasks, making it difficult to compare proposals or confirm whether a finding was addressed. Ask that the intended locations and included work be written clearly, especially if repair and finish work are divided between different contractors.
What should a repair plan consider?
A reliable repair plan begins with an assessment of the joint, its neighboring materials, and the way water is meant to move around the building. Appropriate work may be localized, or it may be one part of a larger exterior improvement. Before work is scheduled, establish areas included, what preparation is anticipated, and how completed work will be reviewed. The exact repair depends on site conditions, and a general article cannot specify a product for every joint or building assembly.
Confirm the location and extent
Use photos, maps, elevation notes, or a property work list to distinguish one opening from another. For a home, mark the room or exterior side that corresponds to any interior observation. For an association or commercial property, identify the building and elevation and describe whether the concern repeats. Clear location information helps a site visit focus on the actual condition and reduces reliance on vague directions such as near the back. If many similar locations are involved, group them consistently but preserve enough detail to find each one.
Understand what is included
Ask whether work is limited to applying new sealant or includes removal of failed material, preparation, repair or replacement of adjacent trim, and any required coating work. Not every item will be appropriate for every job. The purpose is to make scope clear, not to prescribe a repair before a professional has inspected the conditions. If some work is excluded, ask how that exclusion affects the sequence and who is expected to address it before the finish work proceeds.
Consider access and occupied-site needs
Work on an occupied home or managed property can require planning around entrances, windows, parking, resident communications, and access to exterior areas. A community-wide scope may need a sequence across buildings and clear notice about when work will take place. Include known restrictions and questions during planning; do not assume every project can be completed at any preferred hour or without coordination. Determine who will receive updates and how residents or occupants can report a concern during the project.
Coordinate related exterior work
Caulking, trim repair, siding work, and exterior painting may interact. If one component needs repair, consider whether painting or another planned improvement should follow it so work is not duplicated. For a larger managed property, exterior painting or repair can be planned alongside existing reserve-study information where relevant, but Middledorf does not write the reserve study and not every scope is reserve-funded. The association or owner remains responsible for budgeting and approvals. A maintenance plan is useful context, not a substitute for a current look at the building.
When should caulking be coordinated with painting?
When a building is due for exterior painting, examine joints and adjacent surfaces as part of the overall planning conversation. Loose or failed sealant, damaged trim, peeling paint, and siding concerns can affect the work sequence. If a joint needs repair, the underlying surface should be addressed at the appropriate stage before paint is applied. Simply painting over a problem can conceal its appearance temporarily without resolving the condition. The estimate or scope should make clear which preparation and repairs are included and which are separate.
That does not mean caulk should be applied indiscriminately to every edge before painting. The correct location and material depend on the construction detail. Some seams are intended to remain open or to drain. The person planning the scope should identify what needs sealing and avoid blocking weep paths, vents, or other purposeful openings. A finish plan should respect the function of the assembly and not optimize appearance at the expense of drainage.
For homeowners, grouping related exterior work can make it easier to discuss the whole visible elevation rather than treating each defect as a separate cosmetic task. Middledorf offers residential interior and exterior painting and free estimates; the appropriate scope depends on the property and an onsite review. The company's exterior painting and property-work information provides a relevant starting point for considering painting alongside exterior maintenance.
For condominium communities or commercial properties, coordination also includes consistency across buildings, resident or occupant communication, access, and project timing. Give the contractor a clear list of observed conditions and the project's objectives. If a property has an existing reserve study or maintenance plan, decision-makers can use that information as context for evaluating timing and scope; it should not be presented as proof that a particular repair is already approved or funded. When painting is one part of a larger improvement, identify which work must precede coating and how that sequence will be confirmed.
How can an HOA or property manager organize the work?
A community-wide review needs a practical record and a decision process. Start with a property map or building list and a consistent way to label locations. Ask residents, maintenance staff, or building representatives to report visible concerns through a defined channel. Avoid asking untrained people to climb, remove materials, or test a joint. Their role is to note what they can see safely. A shared format for observations makes it easier to sort reports by location and identify similar issues across the property.
Group observations by building and elevation. Keep similar conditions together but preserve the specific location of each finding.
Separate urgent observations from routine maintenance notes. A reported leak or interior moisture should not be buried in a long list of cosmetic items.
Include photographs and dates. Consistent images make it easier to compare recurring conditions and explain the concern to a contractor or board.
Check prior work records. Existing proposals, invoices, product details, and maintenance notes may explain what was previously repaired. Treat those records as background, not proof that current conditions are unchanged.
Set the decision question. Clarify whether the community is investigating one known defect, planning broader exterior maintenance, or coordinating work with painting, siding, or trim improvements.
Plan communication. Explain what areas may need access, who will receive updates, and how residents can report an issue during the project.
Property managers and boards should distinguish between observations, professional assessments, and approved work. A resident's photograph can identify a concern; it does not establish cause, full extent, or remedy. Similarly, a proposal describes a contractor's recommended scope, while the association's governing process determines whether to proceed. Keeping these stages distinct supports clearer decisions and reduces the risk of treating a preliminary note as a final specification. If the board needs additional information before approval, identify the specific question and who will answer it.
For broader improvements, bring the building list and known constraints to the site conversation. Middledorf describes work for condominium communities, property managers, and commercial properties, including painting and property-improvement scopes. A site consultation can help clarify visible work to consider; it is not a substitute for the association's engineering, reserve, legal, or budgeting advice where those are needed. Property decision-makers should maintain their own approval process and rely on appropriate professional advice for questions outside the contractor's scope.
What should homeowners know before trying a small repair?
A homeowner may be able to handle simple, accessible maintenance, but first determine whether the joint is appropriate for sealing and whether surrounding material is sound. Read the product label and manufacturer instructions, consider surface and environmental requirements, and use safe access. If the gap is high, unusually wide, recurring, or associated with water entry or damaged wood, do not treat a quick bead as a complete fix. It can be difficult to identify the purpose of a detail from one visible angle.
Do not apply a new layer over loose old caulk, flaking paint, damp material, or a surface that has not been prepared as directed. Do not fill an opening designed to drain or ventilate. Avoid guessing about product compatibility where different materials meet. A product may look suitable in the tube but may not be appropriate for the specific joint, substrate, exposure, or expected movement. Product instructions matter, but they do not identify whether a particular building opening should be sealed in the first place.
Stop and seek an onsite assessment when the joint has repeatedly failed, the material around it seems soft or damaged, water appears indoors, or a broader exterior component may be involved. The visible gap might be the least complicated part of the problem. A qualified review can help determine whether the next step is localized maintenance, trim or siding repair, painting, or another type of evaluation. Avoid covering evidence of deterioration before it has been assessed.
Homeowners planning a full exterior repaint can make a list of these conditions before requesting an estimate. Mention affected elevations, any history of leaks, prior patching, and other work under consideration. Middledorf provides free onsite estimates for painting; the estimate should reflect the work discussed and observed rather than assumptions about unseen conditions. An estimate conversation can identify the painting scope and related visible concerns, while concealed conditions may require further evaluation if they are discovered.
How should you compare proposals for exterior joint work?
There is no public standard rate card for exterior caulking and sealing, and a price cannot be responsibly inferred from a photograph or general description. A proposal depends on what needs attention, access, surface preparation, the amount and type of repair, and whether adjacent painting or other work is included. Historical project figures or an advertising average are not a quote for a particular property. The way to compare options is to make sure each proposal is addressing the same locations and tasks.
When reviewing proposals, compare scopes rather than only totals. Check whether they identify locations, describe preparation, distinguish sealant work from material replacement, explain what painting or finish work is included, and identify exclusions. If one proposal includes trim repair and another only describes a new bead, they are not equivalent offers even if the same general term appears in both. Ask for clarifications in writing so the owner, manager, and contractor share the same understanding before approval.
Questions to ask include:
Which joints and buildings are included, and how were they identified?
Will existing failed material be removed, and what preparation is planned?
Are damaged substrates or trim included, excluded, or subject to separate approval?
How will the contractor avoid blocking intended drainage or ventilation openings?
Is painting or another finish included after repair, or will it be a separate scope?
What access, resident coordination, and site protection should the property expect?
How will completed areas be reviewed and remaining items documented?
Ask for written clarification if a proposal uses broad descriptions such as seal exterior without defining included areas and tasks. A clear scope helps owners decide what they are authorizing and gives the project team a shared reference during work. Do not assume a proposal includes a warranty, a particular product, or work beyond its written terms. If an unforeseen condition is found, clarify how the contractor will document it and obtain approval for any change to scope.
How does exterior caulking fit into a larger property plan?
Joint maintenance is one component of exterior stewardship. It should be considered alongside observed conditions of siding, trim, paint, roof transitions, and other elements that affect water management and appearance. A property may need a small isolated repair, or it may benefit from a coordinated review that groups related tasks. The right choice depends on actual conditions, access, owner priorities, and work already planned. A maintenance schedule can help decide when to inspect, but it cannot establish the current condition without observation.
For occupied communities, planning includes more than the building surface. Boards and managers may need to coordinate a consistent finish, communicate with residents, sequence work across buildings, and account for access and timing. A documented condition survey can turn scattered observations into a scope conversation without suggesting that every building needs identical work. A community with different construction types or repair histories should preserve those differences when discussing a project instead of assuming that a single treatment suits all buildings.
If a reserve study exists, its information can be one input when a board discusses long-term exterior maintenance. It does not mean every recommended or observed repair is reserve-funded, nor does it replace a current assessment of the building. Keep the roles clear: the reserve study provides planning context, a site review documents observed conditions, a proposal defines a contractor's offered work, and the board follows its own process for authorization. Do not imply that Middledorf writes the reserve study or determines how a community funds a scope.
Middledorf Property Services serves Washington, DC, Maryland, and Virginia and offers residential and commercial painting and property-improvement work, including exterior painting and carpentry such as trim and rot repair. For managed communities, the company describes coordinated capital-improvement work. The fit of any particular scope depends on the site and requested work. See the company's exterior services information when considering how painting may relate to trim and other exterior improvements.
What should an exterior inspection record include?
A useful record is specific enough that someone else can find the same location later. Start with the date and observer, then identify the building, elevation, floor if known, and nearby feature such as a window, corner, or trim board. Use a simple location code consistently. Building C, east elevation, second window from the north corner is more actionable than caulk missing upstairs. For a home, note which side of the house and which feature the observation concerns. Avoid recording personal information that is not needed for maintenance.
Photographs should tell two parts of the story. A wider view shows the location within the elevation; a close view shows the joint or surface condition. If possible, take both from a safe position and do not alter the area to make the image clearer. Where multiple buildings have similar construction, note whether the photographed detail appears typical or unusual. Record when the photo was taken and whether it shows a new condition or one that was already in the maintenance log.
Use neutral descriptions. Write visible gap at trim-to-siding edge or paint is lifting beside the window frame rather than bad installation or waterproofing failure unless a qualified assessment has established that conclusion. Record what is seen separately from what someone suspects. That distinction helps a contractor evaluate the condition without inheriting an unverified diagnosis. Include whether the area was accessible and which parts could not be inspected from the observer's safe vantage point.
Close the record with the action taken: monitor, request review, include in a proposal, or document a completed repair. If work is completed, attach the final scope or invoice available to the owner and note whether a follow-up observation is planned. A record does not need complicated software. A shared spreadsheet or property-management work-order system can be sufficient if entries use consistent labels and can be retrieved when planning future work. A clear record helps avoid repeating an inspection simply because an earlier observation cannot be found.
How do weather and exposure affect inspection planning?
Exterior joints experience different conditions depending on orientation, shading, overhangs, nearby trees, and exposure to wind-driven rain. An elevation with direct sun may show different paint and sealant conditions from a sheltered side. A corner that receives runoff may deserve a closer look than a protected wall, while a joint behind a projection may be difficult to see from the ground. These differences are reasons to inspect systematically rather than assume one repaired location represents the whole property.
Weather also affects when certain repair products can be applied. Surface temperature, moisture, forecast conditions, and product instructions may all matter. Owners should not direct a contractor to apply a particular sealant on a specific day without considering product requirements and actual site conditions. When scheduling work, ask how weather affects preparation, application, curing, protection, and the sequence with any paint coating that follows. The appropriate timing is project- and product-specific rather than a fixed calendar date that applies to every exterior.
On a property with many buildings, a consistent observation route can reveal whether issues cluster on one exposure or occur across several elevations. Do not assume the pattern proves a single cause. It is a clue to share with the person assessing the work. A repeated issue may reflect similar exposure, materials, past repair choices, or another condition, and those possibilities need to be evaluated rather than guessed from photographs. Patterns are useful for prioritizing questions, not for replacing an onsite assessment.
After a significant storm or a report of water entry, document newly observed conditions and compare them with previous records. Avoid treating weather as the explanation by itself: a leak appearing after rain does not establish the exact entry point. Water can travel along concealed paths before becoming visible indoors. Share timing and location with the person assessing the property so those observations can inform a broader review. If moisture is active indoors, report it through the property's appropriate maintenance or emergency process as well as recording the exterior observation.
How do siding and trim conditions change the repair decision?
Sealant joints connect materials, so the condition of both sides matters. If the trim edge is soft, split, loose, or missing material, filling the gap may leave a weak surface to bond to. If siding is moving, damaged, or improperly aligned, a bead may not correct the underlying issue. Paint failure at the edge may indicate that preparation, moisture, or substrate condition needs attention. These signs should prompt a closer evaluation of the components, not automatic application of more caulk.
Where rot or other deterioration is suspected, record visible evidence and avoid covering it before the material is assessed. A contractor may need to determine whether the damaged section can be repaired or whether replacement is appropriate. The extent may not be apparent from the outside surface alone. Any proposal should distinguish carpentry or material repair from sealant and paint work so the owner understands what is included. A visual note should not be treated as a definitive determination of how much material is affected.
Likewise, siding is part of a larger water-management assembly. Its overlaps, clearances, flashing, and drainage details can affect whether water sheds as intended. Applying sealant to every seam or edge may interfere with those details. If an opening is repeated across a wall system, seek an assessment of the assembly rather than asking for a blanket caulking treatment. The goal is to keep designed water paths functioning while closing only joints that are meant to be sealed.
For a painting project, note both finish condition and underlying material concerns. A fresh coat changes appearance but does not make an unsound substrate sound. Discuss preparation, repairs, and sequence before the proposal is finalized. If repairs are excluded from the painting scope, decide who will address them and when, so finish work does not proceed on the assumption that another task has already been completed. Keep the intended boundary between repair and coating work clear in the written scope.
How should a multi-building project be phased?
Phasing can help managers coordinate access, communication, and decision-making across an occupied community. It should be based on property priorities and actual scope, not a generic sequence copied from another site. Some properties may group buildings by condition or elevation; others may need to coordinate with painting, siding, or planned capital work. The site review and proposal should make the proposed sequence understandable to people approving and managing the work. A phase is a planning tool, not proof that all buildings have identical needs.
Before work begins, create a list of areas included in the first phase and a way to confirm completion. Share expected access needs and the best channel for residents or occupants to report a concern. A manager might route observations through a designated contact rather than having individual residents direct workers or request changes on site. This keeps contractor instructions and owner decisions aligned. Identify who can approve a scope change so newly observed conditions are not treated as automatically authorized work.
As a phase progresses, compare work completed with the agreed scope and record any excluded or newly discovered condition for review. A newly visible issue may need discussion, a written revision, and the property's approval. Similarly, a completed building should not be assumed to have received every task merely because another building had a similar scope. Use location-based records to keep the work clear. If an item cannot be completed as planned, record the reason and the next decision needed.
For associations, phasing also provides a way to communicate what is happening without promising a date or outcome that has not been confirmed. Explain which areas are under consideration, what residents may need to do, and where questions should go. If timing changes because of access, weather, or a scope decision, update affected parties through the agreed channel. Do not promise that all work can be completed within a particular period unless the approved project plan establishes it. Clear communication helps residents understand what is planned without overstating what has been decided.
What mistakes should owners avoid?
Sealing by appearance alone. A visible gap is a reason to investigate, not proof that the opening should be filled. Confirm the function of the detail first.
Covering damage to make it look finished. A bead over deteriorated trim or a coat of paint over failed material does not resolve the underlying condition.
Applying product without suitable preparation. Follow product directions and address surface condition rather than assuming new material will adhere to anything.
Ignoring water-management details. Drainage openings and ventilation paths can be purposeful. Do not block them in a broad attempt to make the exterior airtight.
Using an isolated photo to define a large project. A close-up may not show adjacent flashing, the broader elevation, or the source of moisture. Arrange an onsite review when scope or cause is uncertain.
Comparing proposals with different scopes as if they were identical. Confirm included locations, preparation, repairs, finish work, access, and exclusions.
Assuming a repair is guaranteed or permanent. Use the written scope and product documentation for actual terms. Do not infer a specific service life or warranty.
Forgetting occupant coordination. Exterior work at an occupied building can affect access and daily routines. Plan communication and routes as part of the project.
These practices help owners avoid both under-scoping and unnecessary work. A careful assessment may conclude that a joint needs repair, adjacent trim must be addressed, or a visible gap is intentional. Each conclusion leads to a different scope. The value of inspection is not that it guarantees a particular repair; it helps the owner ask informed questions and make decisions based on conditions observed. If a proposal does not address the concern that prompted the review, ask for clarification before treating it as a complete solution.
What details are useful before contacting a contractor?
Before requesting a site visit or estimate, gather information that explains the property and the question. A homeowner can note the affected elevation, nearby window or trim feature, visible condition, any interior signs, and past repair attempts. A manager can add a building list, photographs, access considerations, known material types, and a summary of related work already planned. Previous painting or repair records can be useful context, but do not assume they describe current conditions. A concise packet can help focus the conversation without attempting to diagnose concealed problems.
State the objective plainly. Is the owner trying to investigate a suspected leak, repair a visible joint, plan an exterior repaint, or coordinate maintenance across several buildings? These are related but different requests. Clarity helps the contractor understand what should be considered during the visit and what needs to be included in a written scope. If there are several objectives, list them so the site conversation can distinguish immediate concerns from longer-term planning.
Be candid about what is unknown. It is reasonable to say that a gap is visible but its cause is unclear, or that staining appeared after rain but the entry point has not been identified. Do not promise a repair is minor or describe hidden damage as fact without an assessment. A well-framed question is more useful than a premature diagnosis. Share any relevant history without assuming that the old explanation remains correct.
For an HOA or commercial property, identify who will attend the site conversation and who will review a proposal. If the board, manager, or facilities team has relevant constraints, such as an existing maintenance plan, restricted access, or communication process, raise those early. This does not commit the property to a particular project; it helps ensure that the proposed next step addresses the actual decision the owner needs to make. Tell the contractor if work must be considered alongside painting, siding, or trim improvements already under discussion.
When is an onsite estimate or consultation useful?
An onsite conversation can be useful when there are multiple affected locations, repeated failures, damaged neighboring materials, upper-story access needs, or a plan to coordinate caulking with exterior painting, siding, or trim work. It also helps when the owner or manager needs to distinguish a limited maintenance item from a broader improvement scope. Share what has been observed, what is known about earlier repairs, and what outcome the property is seeking. An onsite review makes it possible to discuss the visible conditions in context rather than relying only on a description or photograph.
For a home, provide the affected side of the building, approximate location, photos taken safely, and relevant history of water entry or repainting. For a condominium association or commercial property, gather the building and elevation list, access constraints, resident or occupant considerations, and applicable project or maintenance records. These details can make a site visit more focused, but they do not replace inspecting actual conditions. If the requested work falls outside painting or the property-improvement scope being considered, ask what type of additional assessment may be appropriate.
Middledorf offers free onsite estimates for painting work. Contact the company to discuss an exterior painting or property-maintenance conversation and determine whether the requested work is a fit. Any final scope should be based on the site and the work described in the estimate. A free estimate is not a fixed price menu or a guarantee that every suspected issue can be diagnosed from one visit.
Frequently asked questions
Does every exterior gap need caulk?
No. Some openings are intentional and support drainage or ventilation, while other joints need a suitable sealant. Identify the function of the detail before filling it. If you are unsure, have the location reviewed instead of sealing it by appearance alone.
Can new caulk be applied over old caulk?
Do not assume that layering is appropriate. Loose or failed material and the underlying surface may need preparation, and product directions govern the repair. Applying a fresh bead over a weak bond or unsuitable surface may not address why the original joint failed.
Will caulking fix rotten trim or a siding problem?
No. Caulk does not replace deteriorated material or correct a failed siding or flashing detail. If adjoining components are damaged or water is entering, the source and affected materials should be evaluated and included in the repair plan as appropriate.
Should caulking be done before exterior painting?
It depends on the joint and project sequence. A painting scope should identify necessary surface preparation and repairs, but not every edge should be sealed. The correct work must preserve drainage and ventilation details and address damaged material before the finish is applied.
How can a community decide whether to repair one area or plan broader work?
Document locations, compare how frequently the condition appears, review available maintenance records, and arrange a site assessment when needed. A repeated pattern across buildings may warrant broader planning, while an isolated defect may be handled separately. The decision should reflect actual findings and the community's approval process.
Call Middledorf Property Services about a free onsite estimate
Thoughtful exterior caulking and sealing starts with understanding the joint, the materials around it, and the way the building is designed to manage water. Record what you see, address damaged components rather than hiding them, and coordinate repairs with painting or broader exterior improvements when conditions and the project plan call for it.